Entering Data
If you are using a database for your data entry you will need to print camera cards to know each students' unique DataMatch ID number and their information.
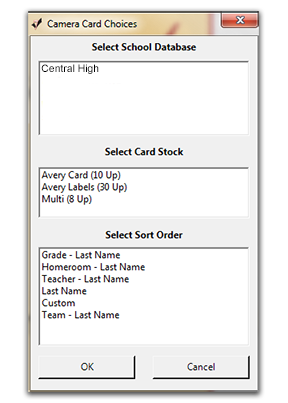
Printing Camera Cards & Labels
- Click on "Data"
- Click on "Print Cards/Labels"
- Select your database on the "Select School Database" menu
- Select what type of card or label you need on the "Select Card Stock" menu
- Select your sort order on the "Select Sort Order" menu
- Click "OK"
Entering Basic Data
This section explains how to enter data using a database as well as entering data manually. DataMatch is very flexible in handling your various workflows for entering Underclass, Events and Sports information. It is impossible to cover all of them in the User's Manual, however our tech support staff can provide you with more information. There is a written description of each of the date entry buttons to help you get a better understanding of how to enter information.
Entering Data Using a Database:
When you import a database, DataMatch assigns each student a unique record number. This record number accesses the student's information. The thumbnails will be displayed along the bottom of the screen. A red box will outline the image you are entering data for.
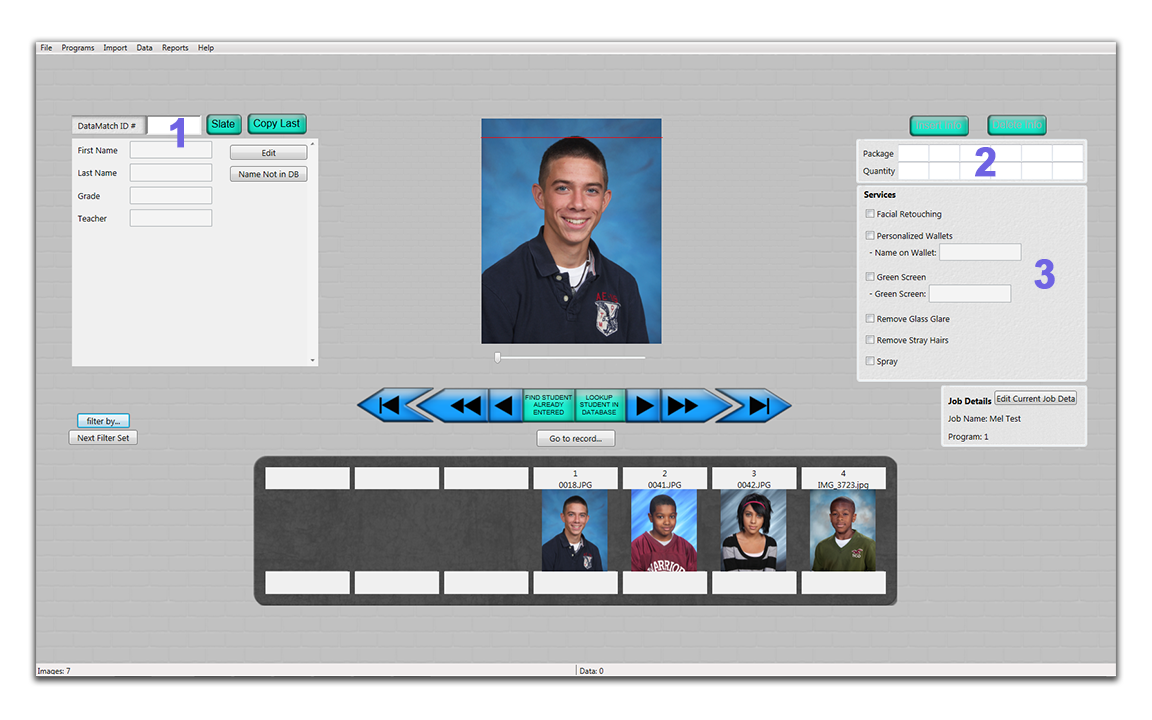
- Type in the "Record Number" of the first student photographed. Hit "Tab" on your keyboard. This will display all of the student's data.
- Your cursor will automatically go to the package field. Enter the letter or the number of the package if more than one type of package is ordered, tab over to the second package field and fill in the necessary information.
- If a student is ordering Retouching, Personalized Wallets, Green Screen or Spray, check the corresponding box. If ordering Personalized Wallets, the students name will appear in the box labeled "Name on Wallet". You can change the name if requested, i.e. Christopher may want Chris on his wallets. The name Christopher will not be changed in the database or on any ID cards, yearbook or administrative CD's.
- Hit "Enter": on your keyboard to advance to the next student.
- DO NOT hit enter after you enter the package information for the LAST image, instead go to "File", "Send Job".
Work Buttons
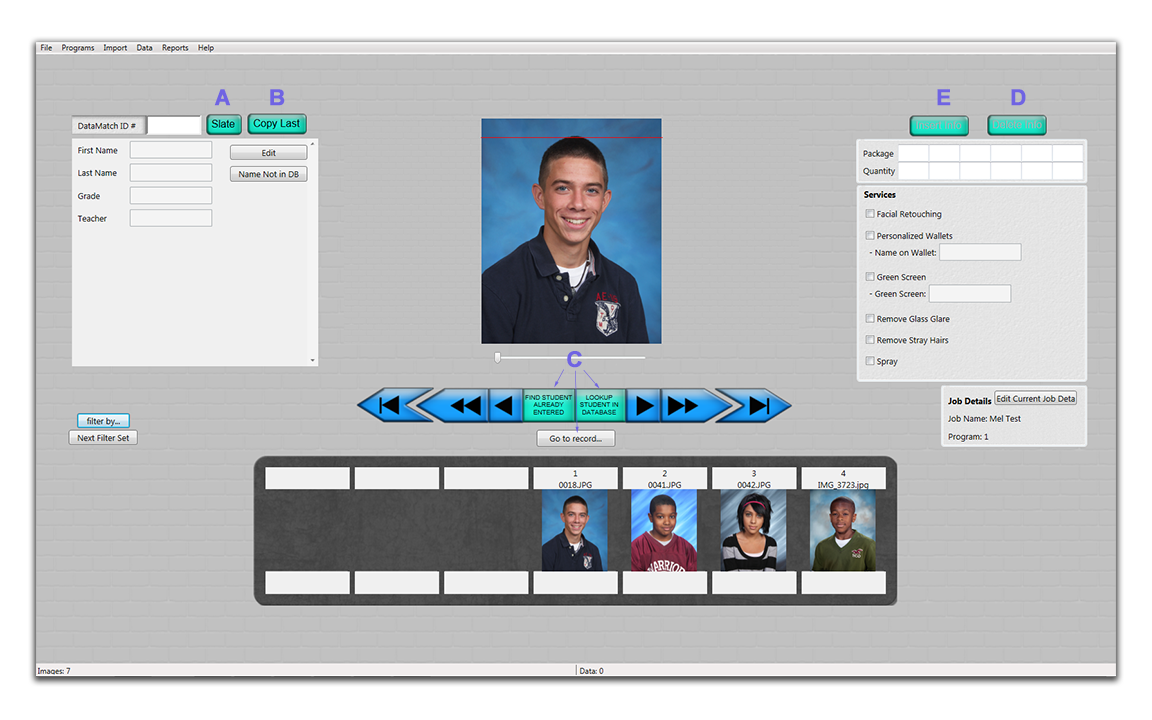
- The "Slate" button is used for images you do not want printed (blanks).
- If you have multiple frames of the same student, use the "Copy Last Record" button to duplicate the student's information. NOTE: You must submit a record for every image or frame that was taken including the slates. Be sure to hit "Enter" to advance to the next student.
- The "Look up Record" feature is used if you did not print out camera cards or labels through DataMatch. Type in the first few letters of the student's last name and click "Find". Locate the student's name on the list, highlight it and click "Insert this Subject". This feature can also be used if you have already entered the student's information and now need to locate that student's name. Click "Go to Record" and the system will bring up the student record you are looking for.
- The "Delete Info" button is to delete information that is incorrect. Go to the sequence number you want to remove, click "Delete Info". It will ask if you are sure you want to delete, click "OK" and a blank data entry screen will appear for you to insert the missing information. All of your previously entered data then shifts and your entry is now in the correct order.
- The "Insert Info" feature is used if you missed entering information on a student. When you click "Insert Info" a window appears and asks what sequence number the information belongs in. Enter the sequence number and click "OK". If you missed entering the third student's information, you would go to sequence number 3, click "OK" and a blank data entry screen will appear for you to insert the missing information. All of your previously entered data then shifts and your data entry is now in the correct order.
- The "Go To" button will take you right to the sequence or frame number you entered.
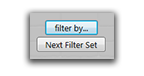
Filters
There are many things that can go wrong during the course of entering data, filters allow you to locate any mistakes quickly and change them. We offer four different ways you can filter your job by. We recommend using all the filters during the process of your data entry.
- Same DataMatch ID #: will bring up any students in the job that may have the same number. If multiple images of the same student show up this filter allows you to easily slate whichever images will not be used. If the multiple images are of different students this means that your data entry is incorrect and needs to be adjusted.
- Slate: shows you all the images that are marked to be slated. If an image that is slated isn't supposed to be this gives you the opportunity to fix any errors that may have occurred in your data entry.
- No Data: locates all the students that the photographer scanned using a blank camera card, allowing you to now enter their information.
- Same Name: locates all students that may have been photographed more than once and therefore have two separate DataMatch ID numbers. You will now be able to slate any necessary images or fix any incorrect information.

Manually Entering Data:
Manually entering data means that you do not have a database to import directly into DataMatch. If this is the case, you will manually enter the information for each student.