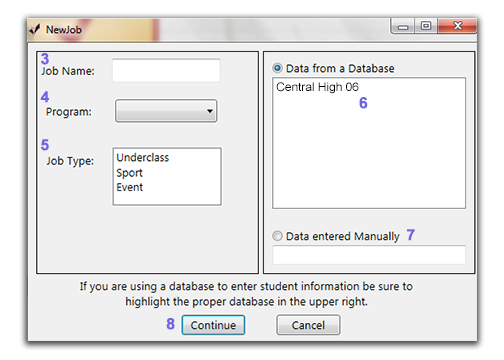
Vital Tip:
When creating a new job we highly recommend the following naming structure: type in the name of the school followed by the number 1. For example, Central High 1. If you return a second day name the job Central High 2. When you go back for the final time name the job Central High 99. This way all jobs for Central High will be listed together. The 99 indicated you will not be returning to Central High and we can merge all jobs for the production of the Yearbook CD. Consistency in naming jobs is the key to ensuring fewer errors during the underclass season.